WirelessToys2012
-
Making Toys – For April 9th
Make and Post 7 Prototypes for your concept(s). 2-3 Role Specific Protos 2-3 Detailed Look and…
-
Final: prototypes
As of now my project is named “trick tracker”. It will be a device that tracks…
-
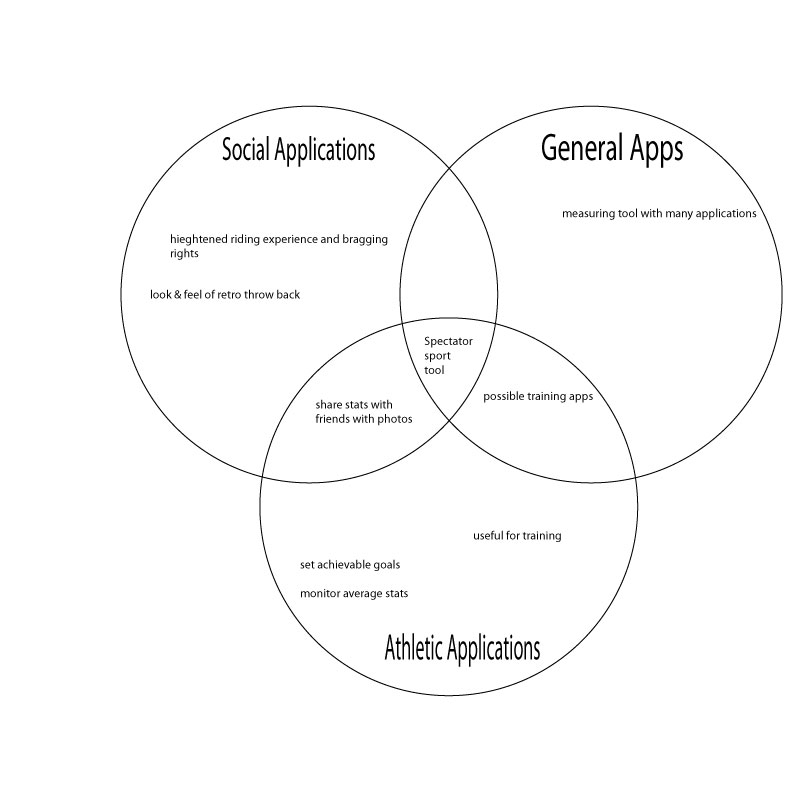
Final Prototypes – Liz Taylor
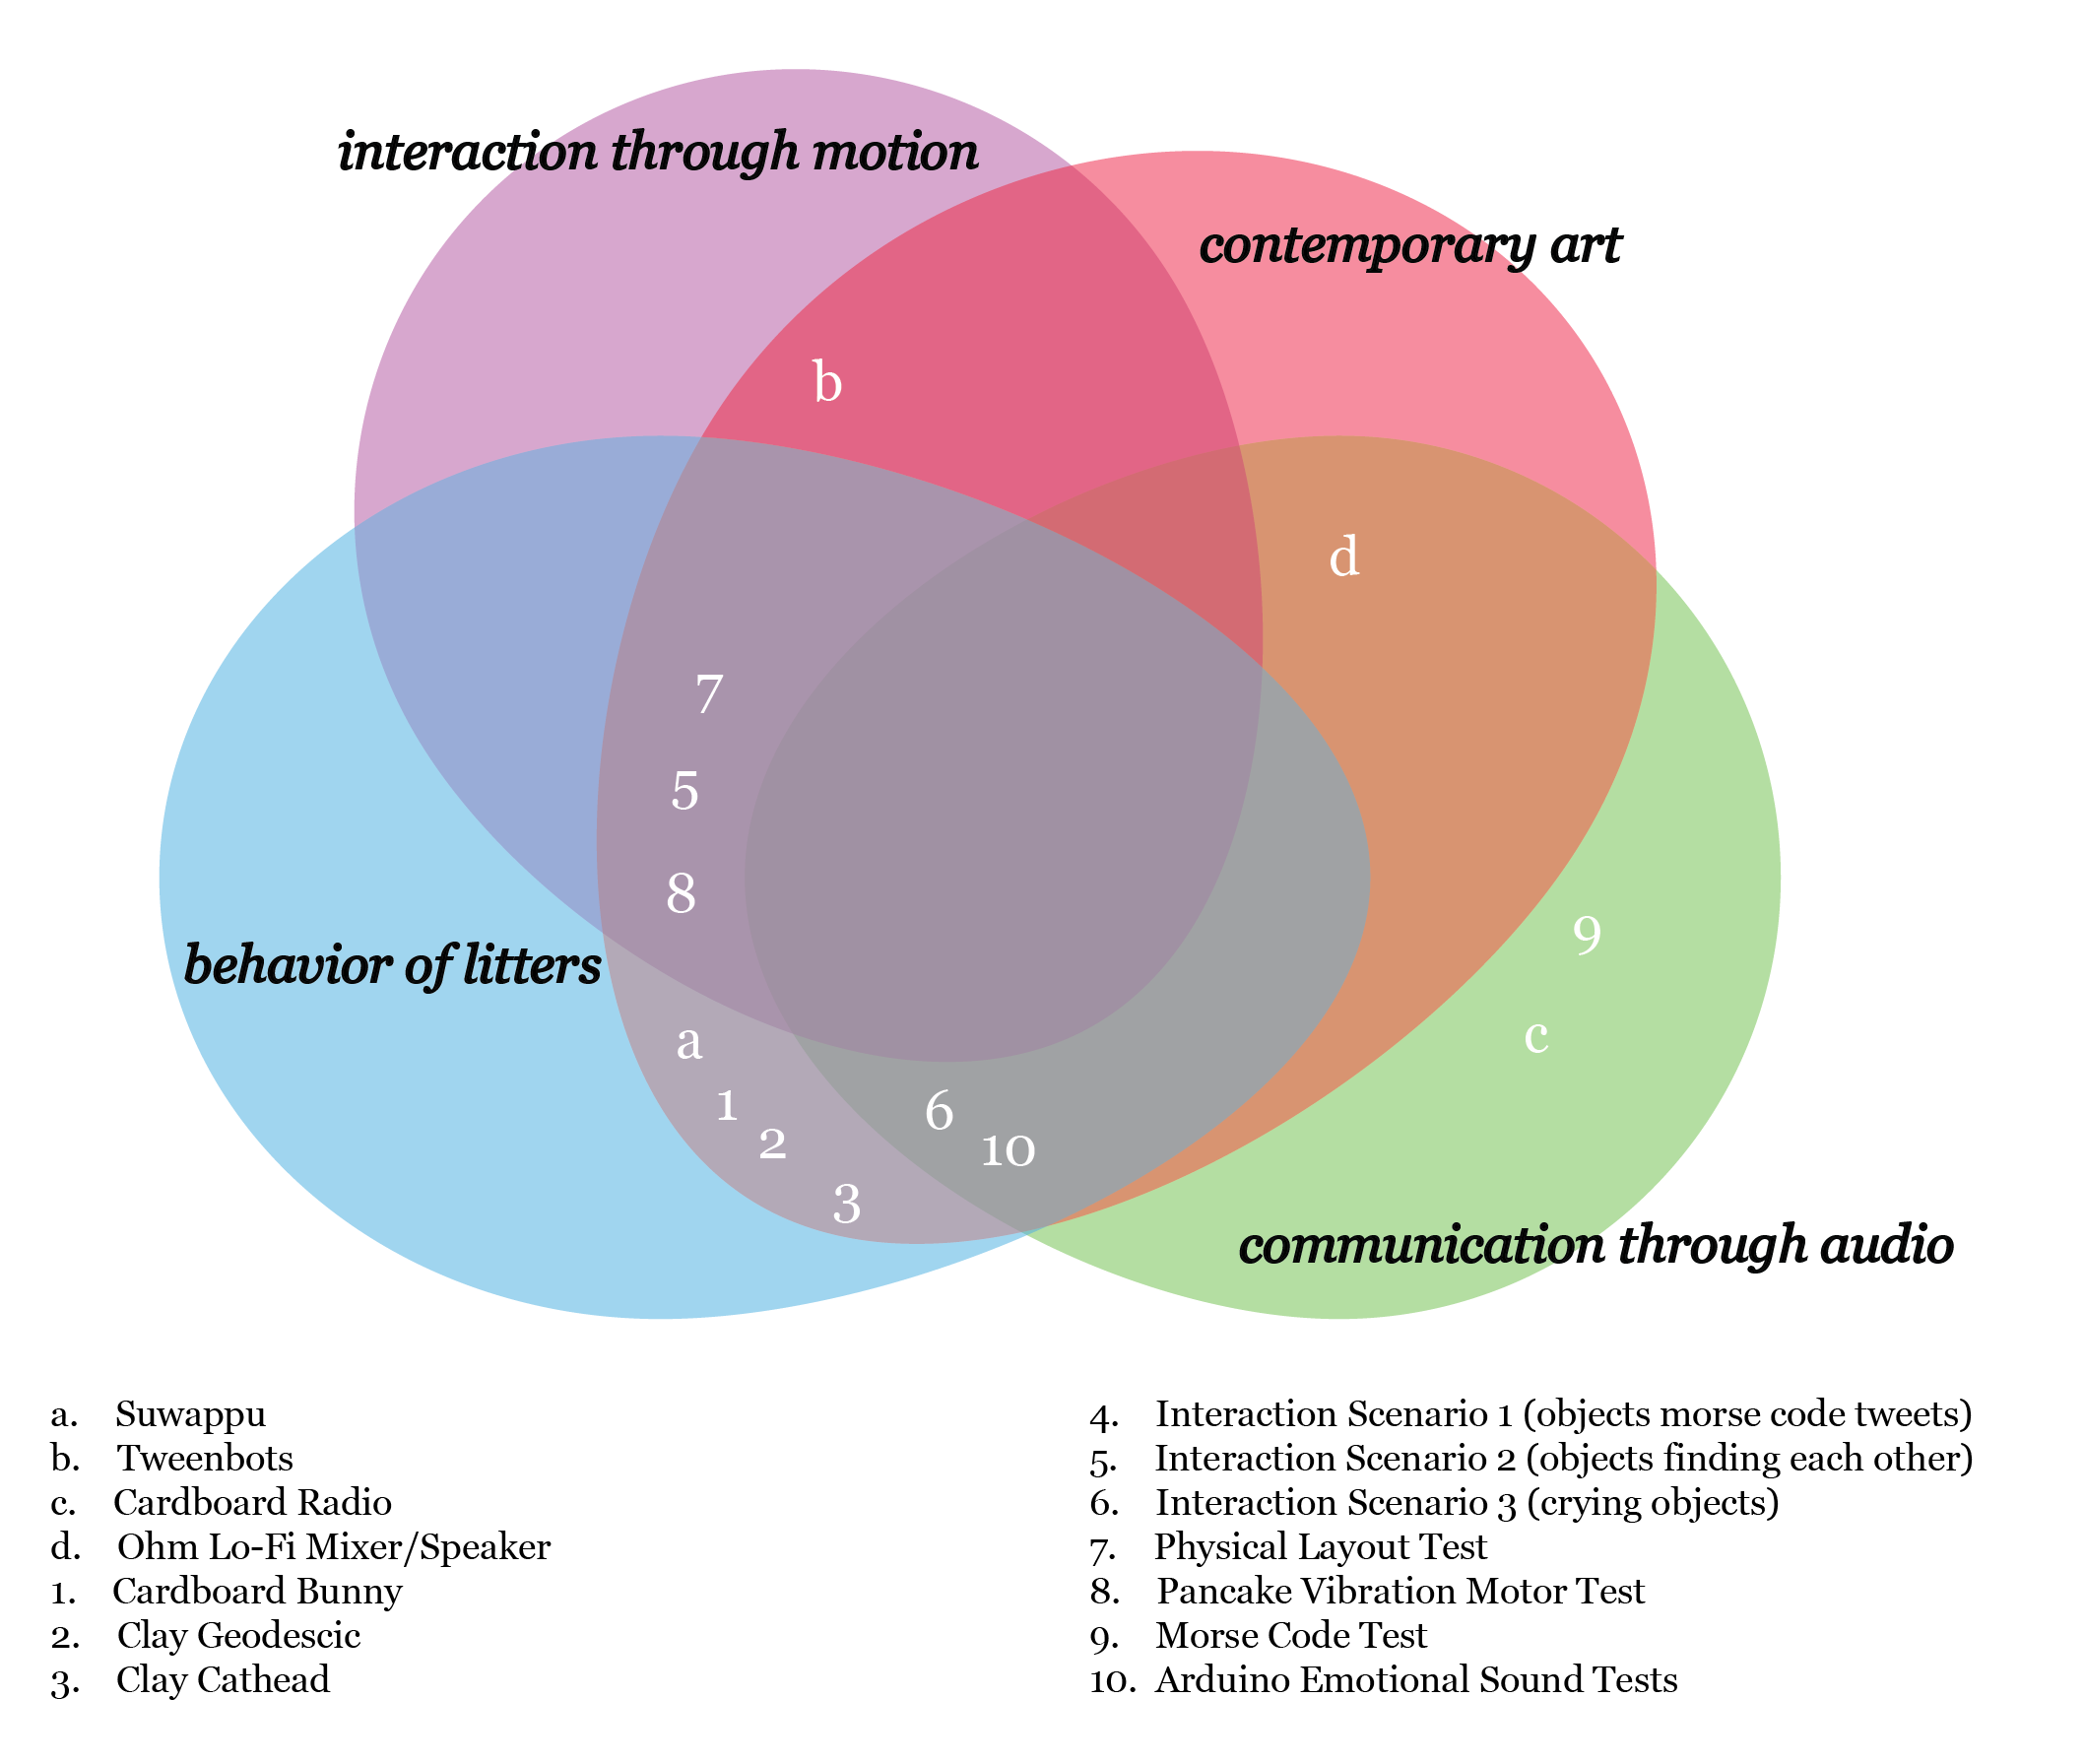
First, here is my venn diagram of domain interest. My domains are: Interaction through motion, Contemporary…
-

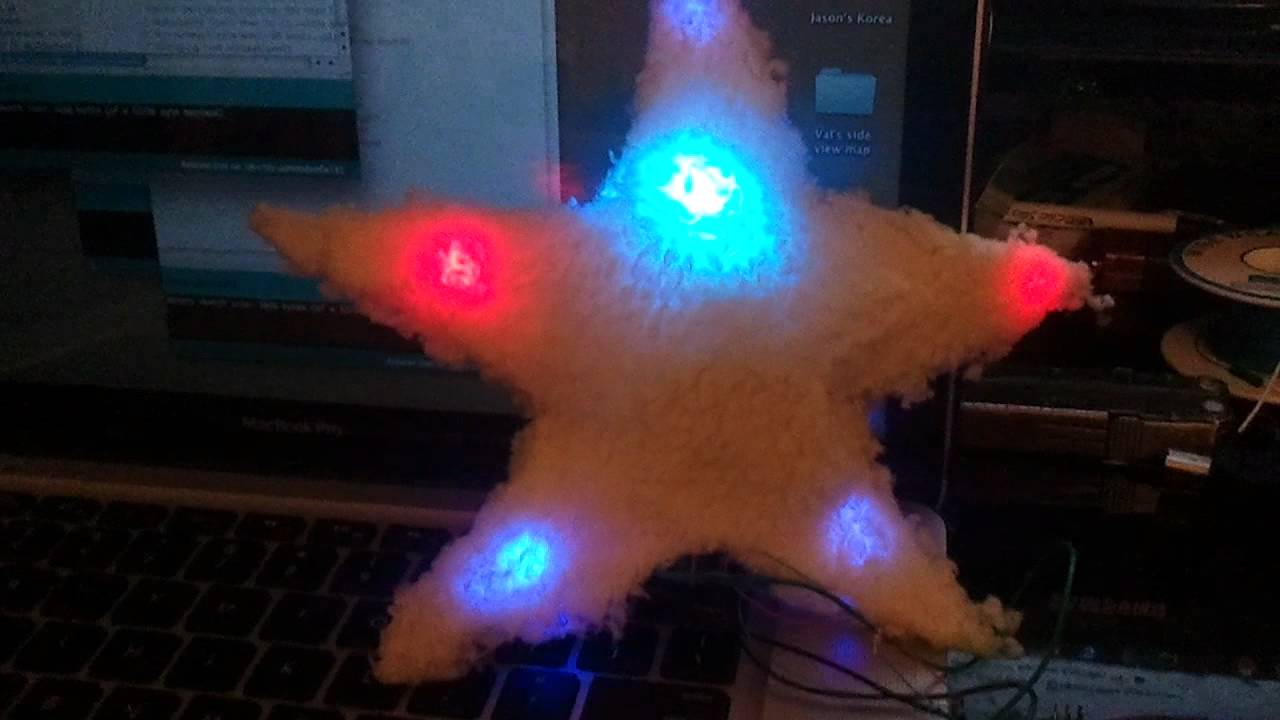
“Feeling Presence” PROTOTYPES
PRIOR ART: KISSINGER: transmitting a kiss over a distance. HERE AND THERE: Emotional communications tool for families…
-

Final Project Concepts || Caitlin+Liza
Descriptions coming soon!
-

Final Project Concepts-Liz Taylor
My concepts are all fairly similar, I basically know that I want to work with a…
-
Pulse Sensor:iteration 2
My second iteration was an experiment of creating a different shape with the fabric provided and…
-

Pulse sensor: iteration 1
For my first use of the pulse sensor and its accompanying code, I created a heart…
-

-
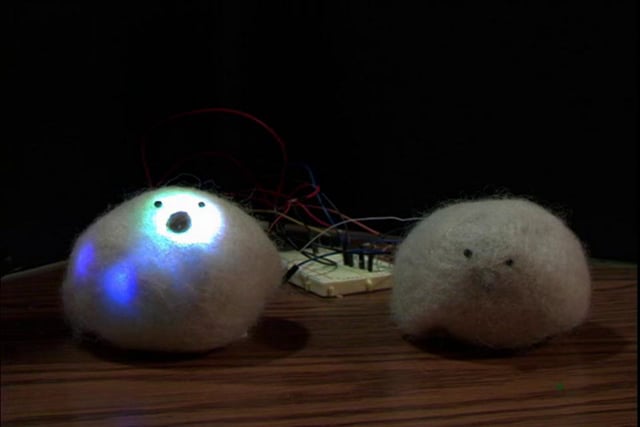
Old post. Light animation + sound
Arduino + 2 lonely chickens.
-

Fabric, stuffing, and 9-volt batt packs.
Supplies for fabric and stuffing are in the last cabinet in pcomp lab. With sign on…
-

animateObject Prototype: Stress Box
This is a series of LED boxes controlled by keyboard inputs via Arduino. First it wakes…
-

Emotion LED’s inside a box project
I found this project to be very rewarding and refreshing. I was surprised about how quickly…
-
Making Toys Assignment for Tues 21st.
Make a “Living Light Object” Create an enclosure (of any material) that diffuses and hides your…
-

-

UFO toy deconstruction
Here are some photos from the deconstruction that we completed in class.
-

Kierstie KJ Barr
My name is Kj Barr. I am from the Bay Area. This is my first year…
-

You must be logged in to post a comment.