March 23, 2012
-

Midterm Journal Entry 2: pulse sensor Runner’s band
The look at feel for my project is practical and simple. I want to embed the…
-
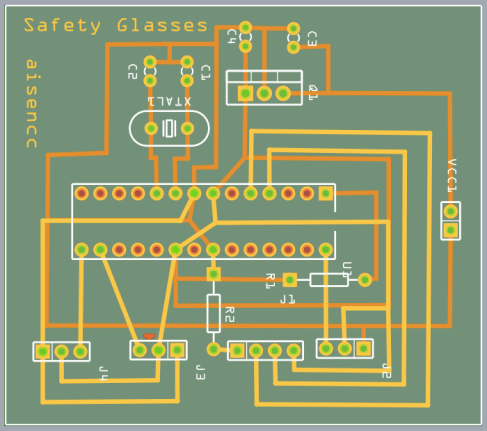
TSG phase 2
I have cleaned up my code and redesigned the pcb to a smaller more compact circuit.…
-

Amira and Ramiro’s Midterm Journal 2 Entry
pictures above in order: 1. physical prototype 2. Code( next phase ) 3. Cards ( look…
-
Norman Diaz’s Midterm Journal Entry 2 (Ambient Lamp)
As a reminder my project will be an ambient lamp, lighted up by an RGB LED…
-

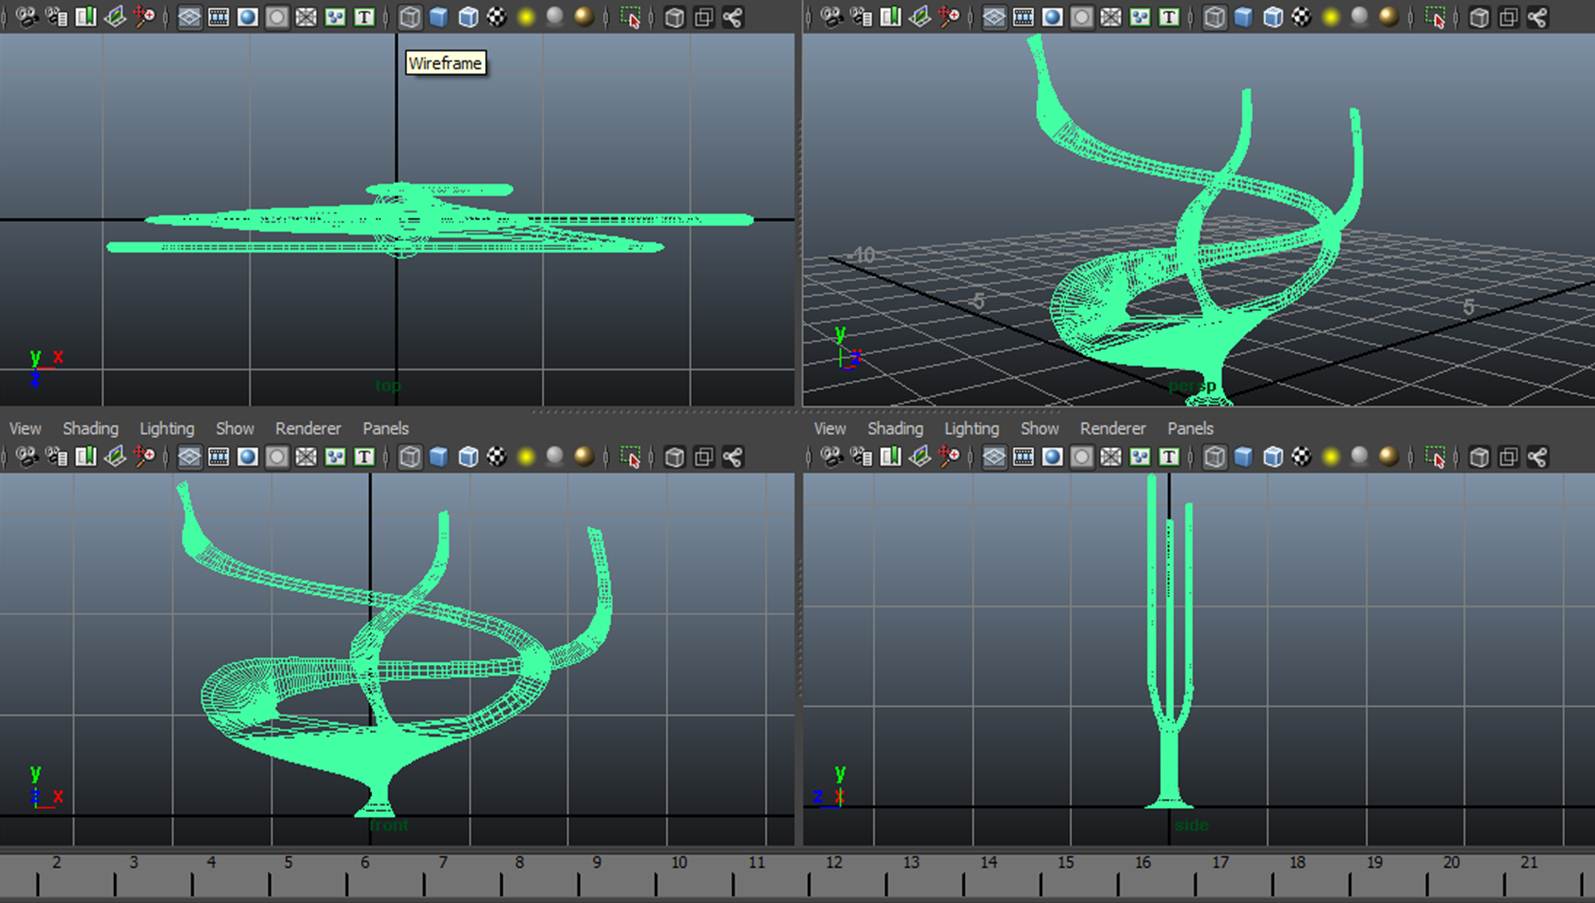
Robot prototype
I finally received my Speakjet from Sparkfun so I spent some time carefully soldering that together…
You must be logged in to post a comment.