Recent Updates Page 31 Toggle Comment Threads | Keyboard Shortcuts

  • Unknown's avatar

    Joe Volpe 3:12 am on March 2, 2012 Permalink | Reply  

    Project_2 

    Each cylindrical unit contains an LED, a speaker(I used earbud speakers), and a button. When you press one button it makes a distinct tone, as when you press two buttons simultaneously, or all three. There are five combination of sounds that you can create and one combination that changes the pitch of the tones.

     
  • Unknown's avatar

    normandiaz 2:03 am on March 2, 2012 Permalink | Reply  

    LED’s Box Toy 

     
  • Unknown's avatar

    adamsabh 2:00 am on March 2, 2012 Permalink | Reply  

    Dedicated to all the Haters 

    I dedicate this post to all of the people that doubted me in Major Studio.

    I would also like to point out that I am the 3rd homework post out of all of you. BOYA!

     
  • Unknown's avatar

    Joe Volpe 1:20 am on March 2, 2012 Permalink | Reply  

    Button Board 

     
  • Unknown's avatar

    naterudolph 5:55 pm on March 1, 2012 Permalink | Reply  

    SparkFun Beat Box 

    I’ll talk about it in class so there’s no need to cover everything here, but for anyone that’s super bored here’s a blog entry about some of the process for this.

    Here’s what I have so far for the project:

    The connections on the tiles need to be made more stable so you don’t have to hold it down to ensure it’s connected. Right now the top left washers cycle through the speed of the beat, and get reset to zero. Eventually I’d like to made it so the speed fluctuates up and down, but for now it’s still an easy way to lock into a speed you want to use.

    The bottom two sets of washers have some older code on them right now that’s pretty boring sounding and I’ve just been using to test things out. Eventually they will allow you to set certain parameters over the beat being made.

     
  • Unknown's avatar

    Yury Gitman 6:54 pm on February 28, 2012 Permalink | Reply  

    Class Notes/Lecture on Pulse Sensor Classroom Project 

    https://docs.google.com/document/d/1ZeaoKg2Gu-MnUz8zR4tOv1x-YcpqBAQQ3N9J-9Adzow/edit

     
  • Unknown's avatar

    Dah-Ni 4:53 pm on February 28, 2012 Permalink | Reply  

    Response to What do Prototypes Prototype 

    As I was going over the reading, there were four principal categories of prototypes in a model. There were Role, Implementation, Look-and-Feel, and nuts and bolts (Integration). First, Role, “The purpose of the prototype was primarily to explore and visualize an example of the role of the future artifact.” (page 4, line 24) In my own understanding, prototype’s role is about presenting the functionality of a finished object. Second, Implementation, “It refers to questions about the techniques and components through which an artifact performs its function.” (page 3, line 42) Throughout the process of prototyping a finished object, we need to figure out which sort of technologies need to be added to fulfill its’ functionality. That’s the Implementation part of prototyping. Third, Look and Feel, ” it denotes questions about the concrete sensory experience of using an artifact-what the user looks at, feels and hears while using it.” (page 3, line 39) As a finished product is designed for users to experience, prototype needs to be specific about its use and its’ purpose of being developed. How it is going to function and what outcome will be brought to the users are the key aspects of prototyping. Lastly, Nuts and bolts(Integration), “How prototype actually works.” (page 3, line 44) When we are developing the prototypes, we have to be concrete with the idea of how it is going to be used. We have to be specific about its’ functionality.

    The goal of prototyping is about solving a problem. “Given a design problem, designers can use the model to separate design issues into three classes of question which frequently demand different approaches to prototyping.” (page 3, line 47) Designers need to come up with a solution for the exact problem. That’s the key idea of prototyping. Designers should provide an idea that can convince others to know what the problem is going to be when prototype comes to a finished product. As designer precisions about the problem of finished product of prototype, designers need to examine a solution for its problem.

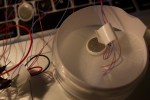
    To conclude, while I was finishing the reading, I was able to remember the time when I made a prototype of my designed object called, “Emotion Capture.” (Please see the picture below) As it is shown on below picture, this is a prototype that is combined with three objects which are digital frame, alarm clock, and a film clapper. Its’ functionality is to have users to remember the moment when they want to reminiscence the moment of specific time they want to remember. As a film clapper is clapped, one of memorable music that is associated with the time of certain period will be played and associated pictures will be shown on the digital frame, when this device is being used. By having this result, users are able to remember their precious moment of their life with emotion. As I was crafting this prototype, I was able to think about, how this designed object needs to be finished and what technological aspects need to be added on as a finished product.

     
  • Unknown's avatar

    adamsabh 9:02 pm on February 27, 2012 Permalink | Reply  

    Not 1….but 2 Buttons! 

    My video


    No problems this week. It went surprisingly smooth.

     
    • naterudolph's avatar

      naterudolph 9:40 pm on February 27, 2012 Permalink | Reply

      2?! What kind of electronic wizardry is this??

  • Unknown's avatar

    mikesusol 5:38 pm on February 27, 2012 Permalink | Reply  

    Push Buttons (x2) 

     
  • Unknown's avatar

    christopherkoelsch 5:36 pm on February 27, 2012 Permalink | Reply  

    Two Button Push 

     
  • Unknown's avatar

    naterudolph 4:35 pm on February 27, 2012 Permalink | Reply  

    2 buttons, 2 LEDs 

    I tried to upload the Fritzing diagram with the Arduino code, but the Fritzing site is down at the moment.

     
  • Unknown's avatar

    normandiaz 10:58 am on February 27, 2012 Permalink | Reply  

    2 Buttons 2 LED’s 

     
  • Unknown's avatar

    normandiaz 10:55 am on February 27, 2012 Permalink | Reply  

    LED Box 

    I used 5 LED’s for this project assigning 3 different functions to them. Here is a link on how it looks like.

     
  • Unknown's avatar

    lizastark 3:13 am on February 27, 2012 Permalink | Reply  

    animateObject Prototype: Stress Box 

    This is a series of LED boxes controlled by keyboard inputs via Arduino. First it wakes up, still a bit tired, but quickly decides to talk to you. But then it begins to become anxious while speaking, and its generally calm fade enter a frenetic spiral of light. Exhausted and fragmented from this bout of stress, it becomes tired again, eventually going back to sleep.

    Rearrange its face as you see fit for an expression of anxiety!

    Also (and just for fun), while I did miss the last class, I was making a littleBits toy during the same time for a workshop. I LOVE electrical tape.

     
  • Unknown's avatar

    Joe Volpe 1:03 am on February 27, 2012 Permalink | Reply
    Tags:   

    Emotion LED’s inside a box project 

    I found this project to be very rewarding and refreshing. I was surprised about how quickly it came together once I had obtained all of my supplies. Time is always an issue especially when working full time and attending courses.

    Below is a video of my first iteration of this project. Soon I’ll be wiring up a speaker that will play 8 bit sound effects to accompany this box of lights.


    Be aware that the video trails on a bit as I didn’t cut the music correctly. The videos is over after the calming section fades to black.

     
  • Unknown's avatar

    adamsabh 7:32 pm on February 21, 2012 Permalink | Reply  

    LED Box 

    What I found most challenging for this project was getting my individual  functions to loop once the function was called upon. I had a hard time figuring out how to order my functions and to get them to act as an individual function instead of take on elements of others while performing. I knew the problem lay in my coding so it was mostly a guess and check system during its building process.

    I am still struggling with adding characteristics to my functions. I cant seem to get the code to perform certain actions within the function without jeopardizing the entire functionality of the segment.

    However, I am proud of the way my box cam out. Its a simple, clean and very effective way of presenting the LED lights. It looks great when lite up in a dark room.

     
  • Unknown's avatar

    aisencc 11:18 pm on February 16, 2012 Permalink | Reply  

    Desert Terrarium 

     
    • aisencc's avatar

      aisencc 11:24 pm on February 16, 2012 Permalink | Reply

      This project was surprising in all aspects. Having left the practice of making projects every week since the brake reminded me that it is practice that makes perfect. It is important to keep these skills current. The delay threw me off! having to rename it so it can be checked and not interfere with other commands was the most unexpected challenge this project brought to me. Also, I forgot how fun it can be to find beautiful colors rather than have the cycling rainbow effect. This project brought me back to my earthy roots, I am glad to incorporate sand and its other state silicon.

  • Unknown's avatar

    naterudolph 11:14 pm on February 16, 2012 Permalink | Reply  

    White LED Box 

    I wrote up a blog entry with much great detail and pics but didn’t want to include all of that here as it would be reruns for most of the people in class.

    Here’s my first iteration of the LED enclosure assignment.

    And here is the second iteration, now incorporating sound.

     
    • naterudolph's avatar

      naterudolph 11:20 pm on February 16, 2012 Permalink | Reply

      I was out of town til Wednesday this week, so when I found out we had an assignment for Thursday’s class my main concern was just getting something presentable. I was surprised at how quickly I was able to get a working prototype with some cardboard and the wire wrap tool. Thankfully everything was laid out neatly with the header pins so I was able to test the code and ensure there weren’t any short circuits.

      The code was actually the portion that took longer than I assumed it might. Making the whole series of LEDs do something was simple enough with a for loop, but trying to do any sort of pattern proved a little more counter intuitive. Using the fade code from Monday’s class I was able to add some variety to that simple sequence of LEDs turning on into something different for the “waking up” function of the box.

c
Compose new post
j
Next post/Next comment
k
Previous post/Previous comment
r
Reply
e
Edit
o
Show/Hide comments
t
Go to top
l
Go to login
h
Show/Hide help
shift + esc
Cancel