Recent Updates Page 19 Toggle Comment Threads | Keyboard Shortcuts

  • Unknown's avatar

    Yury Gitman 5:32 pm on November 29, 2012 Permalink | Reply  

    One Chip Many Programs 

    Using as DIP switch like below is common/traditional way to active/deactivate different programs or features on your program.   Flipping one of these switches ON or OFF can give Power or Ground to a PIN of a microchip.  If you use the Boolean Logic on the Arduino, you can then “active/deactivate different programs or features” in your greater program.  DIP switches like these are usually not “user facing”, they are typically for an engineer or technican to use, like in a TV cable box to turn on/off premium channels, for example.  But sometimes these switches are user facing in a number of off-the-shelf thermostats for example.

    When you put “jumper wires” in your last project, they were to emulate this types of circuit switches. You find them useful as your projects get more complex and may have different types of users that your one device needs to work for.

    https://www.sparkfun.com/products/8034

     
  • Unknown's avatar

    salome 6:23 am on November 19, 2012 Permalink | Reply  

    sound performance toy 

     
  • Unknown's avatar

    carolkozak 9:04 pm on November 16, 2012 Permalink | Reply  

    Sound Performance Toy 

    video: Here

    Code is Collapsed Here:

    <pre>int speakerPin= 7;
    int ledPin = 5;
    int photoPin = A5;
    int potPin = A0;
    int var;
    int potDelay;
    int photoDelay;
    int photoVal;  //analogRead of the photocell //set by
    int potVal;  //analogRead of the potentiometer
    
    int newphotoVal;
    
    int toneVal;  //set by photo, pot, pot, photo (case 1 -4)
    
    int switch1 = 11; //red cord
    int switch2 = 12; //orange cord
    
    int newSwitch1;
    int newSwitch2;
    
    void setup()
      {
        pinMode(ledPin, OUTPUT);
        Serial.begin(9600);
    
      }
    
    void loop()
      {
        newSwitch1 = digitalRead(switch1);
    
        newSwitch2 = digitalRead(switch2);
    
        photoVal = analogRead(photoPin);
        potVal = analogRead(potPin);
    
        potDelay = map(potVal, 0, 1023, 0, 250);
        photoDelay =  map(photoVal, 0, 1023, 0, 250);
    
        //1st case
        if (newSwitch1 == 1 && newSwitch2 == 1)
      {
       var = 1;
      }
        //2nd case
        if (newSwitch1 ==0 && newSwitch2 == 1)
        {
         var = 2;
        }
    
        if(newSwitch1 == 1 && newSwitch2 == 0)
        {
         var = 3;
        }
    
        if(newSwitch1 == 0 && newSwitch2 == 0)
        {
          var = 4;
        }
    
      switch(var)
      {
        case 1:
        potToLEDphotoToSpeaker(); //case 1
        break;
    
        case 2:
        photoToLEDpotToSpeaker(); //case 2
        break;
    
        case 3:
        potToLEDblinkAndSpeaker();
        break;
    
        case 4:
        photoToLEDblinkAndSpeaker();
        break;
    
      }
      }
    
    void photoToLEDblinkAndSpeaker()
    {
      //case 4
    analogWrite(ledPin, HIGH); //analogWrite(pin, value)
    delay(photoDelay);
    analogWrite(ledPin,LOW);
    delay(photoDelay);
    
    tone(speakerPin, photoVal*2); //instead of *4
    delay(photoDelay);
    noTone(speakerPin);
    }
    
    void photoToLEDpotToSpeaker()
    {
    //case 2
        analogWrite(ledPin, (photoVal/4));
        tone(speakerPin, potVal*4);
        delay(20);
    }
    
    void potToLEDblinkAndSpeaker()
    {
      //case 3
    analogWrite(ledPin, HIGH); //analogWrite(pin, value)
    delay(potDelay);
    analogWrite(ledPin,LOW);
    delay(potDelay);
    
    tone(speakerPin, potVal*4);
    delay(potDelay);
    noTone(speakerPin);
    }
    
    void potToLEDphotoToSpeaker()
    {
      //case 1
      //pot to LED and photo to speaker
        analogWrite(ledPin, (potVal/4));
        tone(speakerPin, photoVal);
        delay(20);
    }


  • Unknown's avatar

    itsjennkaye 7:54 pm on November 16, 2012 Permalink | Reply  

    Arduino Sound & Light Tool 

    Download the code here ›

     
  • Unknown's avatar

    Franci Castelli 7:39 pm on November 16, 2012 Permalink | Reply  

    Assignment 11/16 

    So here is the code and the video.. it doesnt work perfectly with the LED but couldnt figure out why.


  • Unknown's avatar

    trytobegood 7:13 pm on November 16, 2012 Permalink | Reply  

    Sensor Toys 

    I had to use if statements to make the switch wires work, then I used switch statements for each of the interactions.

    Code after the jump.

    (More …)

     
  • Unknown's avatar

    lizbethc 7:01 pm on November 16, 2012 Permalink | Reply  

    Switch case sound performance toy…work in progress 

    So, I am completely confused by the wires to switch states…..What I have now grabs each case and will use the speaker and the LED in the exact state its in when I press a number….

     and here’s the code:


    int speakerPin= 7;
    int ledPin = 3;
    int sensorPin = 5;
    int potPin = 0;

    int sensorVal;
    int potVal;
    int LEDbrightness;
    int toneChange;
    int sensorTime;

    void setup()
    {
    pinMode(ledPin, OUTPUT);
    Serial.begin(9600);
    }

    void loop() {

    if ( Serial.available()) // Check to see if at least one character is available
    {
    char ch = Serial.read();
    switch(ch) {
    case ‘1’:

    //1st State controls LED dim level with the POT, and Speaker with the the PhotoCell
    sensorVal = analogRead(sensorPin);
    potVal = analogRead(potPin);

    LEDbrightness = map(potVal, 0, 1023, 0, 255);
    analogWrite(ledPin, LEDbrightness);
    analogWrite(ledPin, (potVal/4));
    tone(speakerPin, sensorVal*4);

    // Serial.print(sensorVal);
    // Serial.print(” “);
    // Serial.println(potVal);

    delay(20);

    break;
    case ‘2’:
    //*2nd State controls LED dim level with Photocell, and Speaker Tone with POT

    sensorVal = analogRead(sensorPin);
    potVal = analogRead(potPin);
    // sensorVal = 1023 – sensorVal;
    LEDbrightness = map(sensorVal, 0, 1023, 0, 255);
    analogWrite(ledPin, LEDbrightness);

    toneChange =map(potVal, 0, 1023, 0, 255);
    tone(speakerPin, toneChange);

    Serial.print(sensorVal);
    Serial.print(” “);
    Serial.println(potVal);

    delay(20);

    break;
    case ‘3’:
    //*3rd State controls LED blink-rate with the POT, Speaker Tone with POT, and Delay Rate (for both) with PhotoCell

    sensorTime = ((sensorVal)/10);

    Serial.println(“sensor reading = “);
    Serial.println(sensorVal); // the raw analog reading
    Serial.println(” “);
    Serial.println(“TIME reading = “);
    Serial.print(sensorTime);

    //Serial.print(” “);
    // Serial.println(potVal);

    sensorVal = analogRead(sensorPin);
    potVal = analogRead(potPin);

    LEDbrightness = map(potVal, 0, 1023, 0, 255);
    analogWrite(ledPin, LEDbrightness);
    // toneChange =map(potVal, 0, 1023, 0, 255);
    // tone(speakerPin, toneChange);
    //
    // Serial.print(sensorVal);
    // Serial.print(” “);
    // Serial.println(potVal);
    //
    // delay(sensorTime);
    delay(sensorTime);
    digitalWrite(ledPin, LOW);
    delay(sensorTime);

    break;
    case ‘4’:

    // *4rd State controls LED blink-rate with the PhotoCell, and Speaker tone with PhotoCell.

    sensorTime = ((sensorVal)/10);
    sensorVal = analogRead(sensorPin);

    analogWrite(ledPin, (potVal/4));
    tone(speakerPin, sensorVal*4);

    digitalWrite(ledPin,HIGH);
    delay(sensorTime);
    digitalWrite(ledPin, LOW);
    delay(sensorTime);
    break;

    default :
    Serial.print(ch);
    Serial.println(” was received but not expected”);
    break;

    }//switch
    } //serial available
    } //void loop
    int RCtime(int RCpin) {
    int reading=0; //startwith0
    // set the pin to an output and pull to LOW (ground)
    pinMode(RCpin, OUTPUT);
    digitalWrite(RCpin, LOW);
    // Now set the pin to an input and…
    pinMode(RCpin, INPUT);
    while (digitalRead(RCpin) == LOW) { // count how long it takes to rise up to HIGH
    reading++; // increment to keep track of time
    if (reading == 30000) {
    // if we got this far, the resistance is so high // its likely that nothing is connected!
    break; // leave the loop
    } }
    // OK either we maxed out at 30000 or hopefully got a reading, return the count
    return reading; }


  • Unknown's avatar

    tiamtaheri 6:22 pm on November 16, 2012 Permalink | Reply  

    [assignment_11/16] 

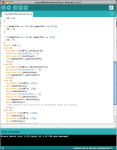
    Here is the case statement code I wrote, unfortunately I get an error, when I try to upload. But all the 4 states work, if I put them in separate sketches:

    int potentiomerPin=0;
    int photocellPin=1;
    int photocellReading;
    int ledPin=10;
    int ledBrightness;
    int speakerPin=12;
    int speakerFrequency;
    int delayPeriod;
    void setup() {
    Serial.begin(9600);
    pinMode(ledPin, OUTPUT);
    }
    void loop(){
    if(Serial.available()) {
    char ch=Serial.read();
    switch(ch);
    }

    case ‘1’:
    number1();
    break;
    case ‘2’:
    number2();
    break;

    case ‘3’:
    number3();
    break;

    case’4′:
    number4();
    break;

    default:
    Serial.print(ch);
    Serial.println(” was received but not expected”);
    break;

    }
    }

    }

    void number1 () {
    int potsensorValue=analogRead(A0);
    photocellReading=analogRead(A1);
    Serial.print(“Potentiometervalue: “);
    Serial.println(potsensorValue);

    Serial.print(“Photocellvalue: “);
    Serial.println(photocellReading);

    delay(1);

    ledBrightness=map(potsensorValue,0,1023,0,255);
    analogWrite(ledPin, ledBrightness);
    speakerFrequency=map(photocellReading, 0,1023,0,255);
    tone(speakerPin,speakerFrequency*10);
    delay(50);
    noTone(speakerPin);
    delay(50);
    }

    void number2 () {
    int potsensorValue=analogRead(A0);
    photocellReading=analogRead(A1);
    Serial.print(“Potentiometervalue: “);
    Serial.println(potsensorValue);

    Serial.print(“Photocellvalue: “);
    Serial.println(photocellReading);

    delay(1);
    photocellReading=1023-photocellReading;
    ledBrightness=map(photocellReading,0,1023,0,255);
    analogWrite(ledPin, ledBrightness);
    speakerFrequency=map(potsensorValue, 0,1023,0,255);
    tone(speakerPin,speakerFrequency*10);
    delay(50);
    noTone(speakerPin);
    delay(50);
    }

    void number3(){
    int potsensorValue=analogRead(A0);
    photocellReading=analogRead(A1);
    Serial.print(“Potentiometervalue: “);
    Serial.println(potsensorValue);

    Serial.print(“Photocellvalue: “);
    Serial.println(photocellReading);

    delay(1);
    delayPeriod=map(photocellReading,0,1023,0,255);

    ledBrightness=map(potsensorValue,0,1023,0,255);
    digitalWrite(ledPin, HIGH);
    delay(ledBrightness);
    digitalWrite(ledPin,LOW);
    delay(ledBrightness);

    speakerFrequency=map(potsensorValue, 0,1023,0,255);
    tone(speakerPin,speakerFrequency*10);
    delay(delayPeriod);
    noTone(speakerPin);
    delay(delayPeriod);

    }

    void number4 () {
    int potsensorValue=analogRead(A0);
    photocellReading=analogRead(A1);
    Serial.print(“Potentiometervalue: “);
    Serial.println(potsensorValue);

    Serial.print(“Photocellvalue: “);
    Serial.println(photocellReading);

    delay(1);
    delayPeriod=map(photocellReading,0,1023,0,255);

    ledBrightness=map(potsensorValue,0,1023,0,255);
    digitalWrite(ledPin, HIGH);
    delay(delayPeriod);
    digitalWrite(ledPin,LOW);
    delay(delayPeriod);

    speakerFrequency=map(potsensorValue, 0,1023,0,255);
    tone(speakerPin,speakerFrequency*10);
    delay(ledBrightness);
    noTone(speakerPin);
    delay(ledBrightness);
    }


  • Unknown's avatar

    YiNing 6:17 pm on November 16, 2012 Permalink | Reply  

    Assignment: sound/LED controls 

    code here:

    int state;
    void setup(){
      pinMode(9, OUTPUT);
      pinMode(2, OUTPUT);
      pinMode(12, INPUT);
      state = 1;
      Serial.begin(9600);
    }
    
    void loop(){
      int pot = analogRead(A3);
      int photo = analogRead(A1);
      int potLight = map(pot, 0, 1024, 0, 255);
      int photoLight = map(photo, 0, 1024, 0, 255);
      int photoSpeaker = map(photo, 0, 1024, 500, 80);
      int potSpeaker = map(pot, 0, 1024, 80, 500);
      int potDelay = map(pot, 0, 1024, 0, 500);
      int photoDelay = map(photo, 0, 1024, 0, 500);
      
      boolean btnRead = debouncefunction(12);
      if(btnRead == true){
       btnRead = 0;
       delay(200);
       state += 1;
         if(state > 4){
           state = 1;
         } 
      }
        
      if(state == 1){
        //state one pot->LED, photosensor->speaker
        analogWrite(9, potLight);
        tone(2, photoSpeaker);
      }
      
      if(state == 2){
        //photoell->LED, pot->speaker
        analogWrite(9, photoLight);
        tone(2, potSpeaker);
      }
      
      if(state == 3){
        // photocell->LED/speaker, pot->speaker tone and led blink rate
        tone(2, potSpeaker);
        delay(photoDelay);
        noTone(2);
        delay(photoDelay);
        analogWrite(9, photoLight);
        delay(potDelay);
        analogWrite(9, 0);
        delay(potDelay);   
      }
      
      if(state == 4){
        analogWrite(9, photoLight);
        delay(photoDelay);
        analogWrite(9, 0);
        tone(2, potSpeaker);
        delay(photoDelay);
      }
     
      Serial.println(state);
    }
    
    int debouncedelay = 500;
    boolean debouncefunction(int pin){
      boolean state;
      boolean previousState;
      
      previousState = digitalRead(pin);
      for(int counter =0; counter > debouncedelay; counter++){
        delay(1);
        state = digitalRead(pin); //readpin
          if(state != previousState)
          {counter = 0;
          previousState = state;
          }
      }
      return state;
    }
    
     
  • Unknown's avatar

    Amp 3:48 am on November 16, 2012 Permalink | Reply  

    analogRead homework 


    It’s a bit messy but the code works with cases as well.

     
  • Unknown's avatar

    Franci Castelli 3:12 pm on November 12, 2012 Permalink | Reply  

    Simon says 

    I forgot that I forgot to upload on friday after it got exported to youtube, apologies.

     
  • Unknown's avatar

    carolkozak 5:23 pm on November 9, 2012 Permalink | Reply  

    Zen Ribbit 

    Updated video: Here

     
  • Unknown's avatar

    Amp 5:01 pm on November 9, 2012 Permalink | Reply  

    SimonBot!!!! 

    I’m so proud of my first d+t prototype! It’s not much but I have learnt a lot through each process. My simonBot makes terrible sound when you loose and also shake it’s head…it’s eyes blink in rhythm along with it’s heart that blinks color leds pattern. Thanks Yury for teaching us awesome trick about…

    Here’s a link

    https://vimeo.com/53134004


    I also want to share my “Flower Flipper.”  I made this for cc lab class with arduino as well.

     
  • Unknown's avatar

    JeannetteSubero 4:55 pm on November 9, 2012 Permalink | Reply  

    Sandy Says 

    Sandy Says

    Construction Photo Details!

     
  • Unknown's avatar

    JeannetteSubero 4:52 pm on November 9, 2012 Permalink | Reply  

    Sandy Says 

    My Simon Game’s enclosure broke during the hurricane, and since most stores were closed, I had to improvise 🙂

    People liked the vibration buzzer when they lost!
    It was a really fun project. I really liked soldering the board for the vibration buzzer.

     
  • Unknown's avatar

    itsjennkaye 3:57 pm on November 9, 2012 Permalink | Reply  

    Jenn Kaye’s Simon-ish Game 

    Voila! Play tested and all.


    (and 2 “regular” videos documenting a successful game in and game loss)

    Win:

    <p><a href=”http://vimeo.com/53632459″>Simon: Win</a> from <a href=”http://vimeo.com/user8129509″>Jennifer Kaye</a> on <a href=”http://vimeo.com”>Vimeo</a&gt;.</p>


    Loose:

    <p><a href=”http://vimeo.com/53632337″>Simon: Lose</a> from <a href=”http://vimeo.com/user8129509″>Jennifer Kaye</a> on <a href=”http://vimeo.com”>Vimeo</a&gt;.</p>

     
  • Unknown's avatar

    sussesj 3:52 pm on November 9, 2012 Permalink | Reply  

    Simon Says In action 

    Here the video af my simons says game in action:

    https://vimeo.com/53161359

    Also find more information about my process here:

    This slideshow requires JavaScript.

     
  • Unknown's avatar

    salome 11:48 am on November 9, 2012 Permalink | Reply  

    simonSays 

     
c
Compose new post
j
Next post/Next comment
k
Previous post/Previous comment
r
Reply
e
Edit
o
Show/Hide comments
t
Go to top
l
Go to login
h
Show/Hide help
shift + esc
Cancel