Updates from March, 2013 Toggle Comment Threads | Keyboard Shortcuts

  • Unknown's avatar

    yaoukar 10:22 pm on March 13, 2013 Permalink | Reply  

    Bureaucratie Paper Automata 

    Paper Automata is using a continuous servo motor and a ultra sonic range finder to control the movement of the toy.

    When the user comes close to the toy, the movement stops. When the users goes far from the toy, the movement goes faster.

     
  • Unknown's avatar

    normanorma 7:29 pm on March 13, 2013 Permalink | Reply  

    Midterm Sketch-up! 


    The following post will compile six sketch of possible projects to work on in our Wireless Toys class. From our instruction Yury’s guidelines: based on the environment, the automata should illicit an emotional response from a user/spectator. This should be an explicit emotion such as: joy,curiosity, compassion, wonderment, hate, love, inspiration.

     1. Crystal Caven 
    My first concept is inspired by Studio Ghibli, where Sophie moves into the depth of Plato’s Cave. There are glistering treasures and objects on the walls of the cave. As the camera moves along with the character, the objects shines and reflects lights to create such a magical spectrum. This sketch is meant to present a sense of wonderment. Through the creation of original object and design based on crystals, perhaps the color of the lights could be inflicted by the user, to give them a sense of wonder.

    32275107-crystal-cave

     howl5

    My Sketch:  Crystal Lights Fixture – Colors changes based on interaction

    crystal

     2. Dearly Deer 

    Much like the first idea, this is a deer character that would glister in lights when you approach it. I imagine this to be built out of plexiglass to have a transparent effect. It would also be inspired to be a potential light or furniture piece for my living room.

    Deer08_0001.jpgeac86341-1c36-41da-b5fd-a191007cee2bLarge

     3. Jellyfish/Jellycats

    I designed these characters during Bootcamp as a processing game. The objective of this game is to catch Jellycats with a red net. I imagine these to be mobile characters that could move around, but if you get too close, they get scared (they are quite shy), so they would move a feet away. There could be more then one at the same time. Imagine this being a cat toy!

    19

    jellycarts

    4. Flying Pig

    I imagine this design to be hung up on a hanging mobile that have a fixed track in order to create movement.
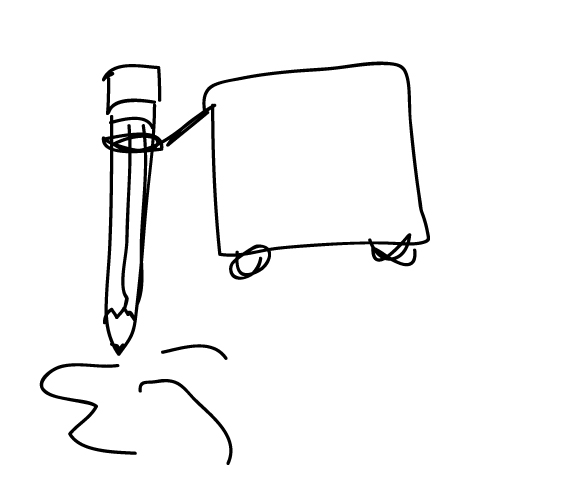
    pigsfly

    flyingpig

    5. Drawing Robot

    This is a drawing tool robot that would draw or scribble. The robot have wheels so it may move around the table.

    drawingrobot

    6. Luring Turtles/ or an Animal

    Using a carrot, or a lure, with a magnetic pull, once the animal detects this sensor, it would move faster. The food is a lure to motivate their movement to work faster!

    turtle

     
  • Unknown's avatar

    danielagill 9:22 pm on March 9, 2013 Permalink | Reply  

    Free Writing 

    1-What did you find surprising difficult in the Embedded Arduino Paper Automata project?

    Even though I’ve had some practice with building paper toys with the last two projects, this one in particular was very hard. The construction of the automata, the Weight of Bureaucracy, was very challenging. The pieces were very small and even though in the book everything is explained very well still there’s a lot of logic and attention that needs to be applied in order for the automata to work well in the end. Also, even though all the pieces one need to construct it are there in the book, I found helpful to be creative and change one or two pieces in order to make it function. All of this helps a lot for understanding the mechanics and system that goes behind it.

    As for the technical part with the micro Arduino, servo motor, Ultrasonic range finder and the battery it took more time than before to make it all work. The reading of the micro Arduino was inconstant. My UBS port for some reason kept loosing it after a while. I had some technical issues with this and it took patience and trying repeatedly to make it work. It seemed to confuse it with Leonardo Arduino. It was frustrating and still is.

    Also making the structure to present everything neatly and to hide the board, motors, cables, battery, etc was challenging too. The solution was to have a mini box underneath a platform where the model and a mini box with the servo hidden is next to it.

    And last but not least the code was challenging too for me because it is somewhat new to me. Figuring out the values and how the paper automata responded to the movement of the servo was hard.

    2-What did you find surprisingly easy?

    The wiring, making the circuits since I am now familiar with these two the range finder and servo motor. Also getting the power from the battery.

    3- Did you get inspired with any derivative work from doing this project?

    Overall these last three projects have been very inspiring and instructive. A good practice in construction with paper. I’ve been thinking about how to make them with a collage of materials and embedding different electronics. I think also the knowledge and practice of understanding the mechanics behind these paper automatas is helpful for a lot of things in design in general. Production of artifacts and of course physical computing. And also makes you aware of the huge potential paper has.

    dg

     
  • Unknown's avatar

    Soo 8:26 pm on March 9, 2013 Permalink | Reply  

    Control it will an Arduino Mini, Servo, Ultrasonic Rangefinder, and Battery Power 

    My third paper automata assignment was “Weight of Bureaucracy” from book, Models that Move. I was super fun automata, but it took more than 6 hours to actual making the paper automata. The challenge part was the servo has to turn only one way, otherwise the paper automata is broke. So, I had to carefully observe ultrasonic rangefinder values and calculate servo position for  the value in code. Using an Arduino Mini and an battery power were simple and easy.

    Please watch video at vimeo: https://vimeo.com/61422425

    IMG_0067IMG_0068

     
  • Unknown's avatar

    Soo 7:50 pm on March 9, 2013 Permalink | Reply  

    Controlling your servo with via computer 

    The first paper craft project assignment about controlling your servo with via computer. The goat head turns to left and right  and speed changes according to the scaled value in code.

    Please watch video at vimeo: https://vimeo.com/61422286


    IMG_0055

     
  • Unknown's avatar

    ZX 2:36 am on March 8, 2013 Permalink | Reply  

    First Eight Basic Mechanisms from Book Three 

    Hi classmates I made the first eight basic mechanisms from book three and turned them into a GIF.

    Hope it’s helpful 😀

    Click the pic below to play!

    mtsamples

     
  • Unknown's avatar

    Soo 11:32 pm on March 7, 2013 Permalink | Reply  

    Free Writing 

    1. What did you find surprising difficult in the this Embedded Arduino Paper Automata project?
    First, the difficult and challenge in this Automata project was putting everything (paper automata, Arduino, and servo) together as an object on a board. My second project, Robot has to be move(travel) with a servo together. It was challenge to put the servo into the Robot, because the servo is heavier than the actual paper automata. Secound, my first goat project and my third project, the Weight of Bureaucracy, turn only one way. If it turns another way, the wheels broke. Therefore, I had to be very careful calculating servo number in coding because the middle number is not always 90.

    2. What did you find surprisingly easy?
    Working on coding in class was a huge help for assignments. Because I am beginner in coding, I was nervous about breaking when I test out my automates but, Arduino cook book and the class lessons made easier to make them happen.

    3. Did you get inspired with any derivative works for doing this project?
    Classmates works inspired me. Adiel’s automata works were impressed, and he pushed the book automata to new level. Also, I think these initial basic lessons and prototypes will give me stronge foundation to make something great in the future.

     
  • Unknown's avatar

    yaoukar 9:28 pm on March 7, 2013 Permalink | Reply  

    Embedded Arduino Paper Automata Journal 

    1-What did you find surprising difficult in the Embedded Arduino Paper Automata project?

    The most difficult part of this project was to construct the actual Automata. The pieces were really tiny and I had to be very meticulous in order to do it right. In order to succeed the task I divided the process into four separate phases: Cutting, folding, gluing and assembling. 

    I also had trouble embedding the servo into the model in order for the rotation to happen. I broke the rotation handle the first time I did it  because it was set up to 180 degrees. 

    The last thing that I found difficult is to embedded all the items into one single entity. I had trouble making the model stable without a base so I tried different approaches to make it work. I tried gluing, using tape and even creating a die cut to keep the model stable. 

    2-What did you find surprisingly easy?

    I found the code pretty straight forward. Playing around with the values of the distance made the process easier. 

    The initial code we did in class, the one that uses Serial print to control the rotation angle was very helpful because I calibrated the servo in order to have more control and be aware of the speed and the rotation angle. 

    3- Did you get inspired with any derivative work from doing this project

    When I broke the rotation handle while doing this exercise, I went back and read the book Karakuri and was inspired by their method to create the rotation. 

    I found the Japanese approach easier and straightforward.

    I also looked into japanese device art. 

     
  • Unknown's avatar

    carlamarinvial 9:19 pm on March 7, 2013 Permalink | Reply  

    Free Writing

    Doing this Paper Automata was a challenge for me, especially when it came to paper cutting. Due to the small scale of the pieces, cutting and glueing on exact points becomes super difficult. I also believe I failed at attempting to hide the Arduino in a proper manner. When I started the project I jumped into building the paper part, but looking back, what I should have done from the beginning was planning how I would get the motor in it first.
    I was surprised when putting the mechanical part together, it all smoothly worked out. At a glance, it seemed to be a rather complicated toy, but the simplicity of its mechanics was a comforting surprise in terms of how simply, interesting movements can be created.
    The whole time whilst working with it I was thinking on the game Mecano and how it would be great to create structures of more solid materials to work with the arduino and sensor. I was imagining a catapult being built with this system out of mecanos… that would be awesome!

     
  • Unknown's avatar

    naims641 9:19 pm on March 7, 2013 Permalink | Reply  

    Embedded Arduino Paper Automata Projecty Journal 

    When working with this project I had a few issues that I stumbled over. At first, for a very long time my Arduino was acting up, it would never fully upload a sketch and kept saying that I was not connecting to “Leonardo” correctly, while I always had Arduino Micro chosen. This continued for hours, I uploaded maybe 60 times and once out of the 60 it would properly load, but then it would stop. I at first thought it had to be a problem with my connection or code, but after working through it I realized that everything I had was right, and it must be a bug in my Arduino because when I came back to it another day and continued to fiddle I realized that it would upload as long as in the middle of the upload I told it to check if the code was correct.

    Before I started the project I new that I did not want to merely copy the example in the book but I wanted to adopt it and make something from it. So I kept looking at the motion trying to figure out what else it could be that would make sense with a range finder and thought that a horse or a dog that sped up when its competitors got close in a race made sense so that is what I decided to make. I knew that I didn’t want to just slap another figure on top of the motion from the structure, but wanted to integrate some sort of new movement into the structure, so I built hinges at the dogs knees so that they would bend as he ran. Building this dog actually took a lot of time because I had to start with different models and see if they worked and modify them until I made something that actually bent at the legs. It was also a bit of a challenge to figure out how to get the dogs legs to bend, and I still think that movement could be improved. The challenge I have is that I have to build the whole thing first to see what its movement is like, then take it apart and do it again which ruins aspects of the model in the process.

    Overall however, I wouldn’t say the assignment was a very difficult one that really used all of my brainpower, but rather it was one that just took a lot time and experimentation to overcome the challenges that presented themselves. For instance, I could have never predicted the problems that arose with loading the sketch to my arduino, and I had to take apart the structure to make sure everything was wired properly, which took a tole on the structure when it was rebuilt. I do think that if we were given this assignment again I would instead of using the mechanisms from the book, try and translate the servo motion into other motion in my own way with my own materials.

     
  • Unknown's avatar

    SLee 9:19 pm on March 7, 2013 Permalink | Reply  

    Embedded Arduino Paper Automata Response 

    What I found surprisingly difficult about this assignment was, surprisingly, making the paper automata itself. I chose to make the pyramid lifter because I couldn’t quite understand what it was supposed to do from reading the descriptions. As I made progress, I started understanding the mechanism, and that it was actually a rather simple one. The problem was, the book’s instruction. The diagrams were confusing and the glossy paper was not suited for folding so much. So, I would say, the most difficult part about this assignment was following instructions in the book…

    On a side note, hiding the arduino and the battery pack was a bit challenging. I originally wanted to have a pedestal underneath the automata to hide the p-comp guts. But the crank is attached to the side of the automata unit. So I somehow had to figure out a way to translate the work of the servo to the crank, but I could not figure that out. Now when I think about it, I think I should have used gears like the ones in the duck and pond automata in the book. I think that would have worked.

    On the contrary, what was surprisingly easy was the coding and the wiring parts. It was my first time using the micro, and at first I wasn’t sure how I was going to tackled the 5v and ground issues, because there aren’t enough pins on the Micro. But I ended up using the wire wrapping tool to wrap both the servo and the range finder’s 5v and ground wires to the pins. So that worked out relatively easily.

     
  • Unknown's avatar

    Jen Matsumoto 9:19 pm on March 7, 2013 Permalink | Reply  

    March 07: Embedded Arduino Automata Free Writing 

    What did you find suprisingly difficult in this embedded Arduino paper automata project?
    The most difficult part to this project was definitely the building of the paper gears and mechanisms. Since we have been doing this for a couple of weeks now, I have gauged that it takes at least 2-3 hours to build the paper automata well. The cutting is especially difficult because it needs to be very precise in order for everything to fit together. You would think that cutting, folding, and gluing does not matter much, but really the craft behind this really determines the success of the project. Another challenge is figuring out clever ways to embed all of the electronics so the automata looks presentable. It’s a struggle because I wanted everything to be enclosed, but needed the capabilities to take apart and trouble shoot for later.

    For me, the coding is always a struggle because I am not familiar with it. I don’t code a lot, or have that background so it’s always a challenge to work out the bugs. Most of the time I am just happy that it works, even if it is not perfect.

    What did you find surprisingly easy?
    Although it is basically the same as the Uno, I actually thought the wiring to the mirco and running off of battery power would be complicated. I expected there to be more issues with the uploading of the code based on the problems we had in class last week, but when I did it at home it actually worked easily. This particular paper model (The Duck Pond) )was made in a way that it was easy to connect the servo to the handle. In the past, it’s taken more time to problem solve how to attach the servo, but since I have that experience from previous weeks, it is getting much more clear to figure out.

    Did you get inspired with any derivative works from doing this project?
    In doing this project I think I did start thinking a little more about how I can make these paper automatas my own. So far, I have strictly been working with what was given from the books. This week, I thought about how to hide and embed the electronics and also how these mechanisms can be used in other ways and other artistic pieces. I like the element of surprise and am wondering how using these elements can change or activate motion when viewing something like a photo on the wall or a sculpture. I was also thinking about how I would be able to use multiple gears to create multiple different movements at one time. I see room to explore the paper automata techniques to make beautiful conceptual pieces.

     
  • Unknown's avatar

    normanorma 9:17 pm on March 7, 2013 Permalink | Reply  

    Free Writing 

    What I found surprising about the Embedded Arduino Paper Automata project is how these paper mechanism could work to make movements. From my own experience, the Paper Automata requires assembly for at least three and more hours. And if you want to modify it, it is really important to think about the concept and what we could use to create that movement. Together, it tells a story as a whole piece. Different illustrations may tell different stories, but the mechanical work is what makes it alive. The mechanical adjustments includes the speed, the direction, the interaction, and so on. All these simple gestures and movements is what makes the project so good or poorly put together.

    Also, when assembling together, it is good to take some time to create the base of the structure and how to hide the wirings. It is so nicely put together when all the wires are hidden (unless that’s the point to have it shown for specific purposes).

    What I found surprising easy was how the SAME mechanism could be changed and adjusted in order to tell a different story. Being a movie to pcom, I am excited to make the slightest thing working. I look forward to work on these skills to improve, so I could make better projects in the future.

    Upon approaching these weekly projects, I am inspired by how beautiful paper could be. There are many artwork and design piece that are made from these papers but it could be just so delicate and beautiful.


    photo-6


    For my project, I decided to make a flying rabbit. The illustrations in this book was not as attractive to me. The mechanism are however more complicated comparing to the Japanese books. The instructions were in black and white, and sometimes I would have to guess which part goes towards which. The flying rabbit works much like my previous project with the shy bear. The rabbit would move faster and slower through the range finder.

     
  • Unknown's avatar

    JeannetteSubero 9:15 pm on March 7, 2013 Permalink | Reply  

    Embeded Arduino Paper Automata – Free Writing 

    Athlete – example 14

    The major difficulty for this particular project was the enclosing the Arduino Micro in the model. The one I chose had a fair amount of space, even to fit an Arduino Uno, but I still had problems trying to figure out how to fit the wires inside, and ended up just using jumper wires that were too long and I just tucked everything inside. For future projects I’m going to think before building how I can actually embed the circuit in the model instead of just tying to make it fit. The tweaks I had to do to make the paper model work with the servo were minor, but still required to do some thinking on how the model worked.

    The easiest part was the actual construction of the paper model. I’ve become more comfortable with it, and using the right tools I can build it with better precision.

    After realizing how simple was the paper automata that I picked, I started to think about the possibilities of a adding more elements, like gears and shafts in order to make other things move. I liked the idea that by making firm joints and leaving others loose you can actually achieve a great deal of movement, and by changing the direction of the servo, and even with the jumpiness from the ultrasonic range sensor reads, helped make the athlete have a more alive behavior.

     
  • Unknown's avatar

    Chy 9:15 pm on March 7, 2013 Permalink | Reply  

    Embedded Arduino Paper automate project 

    1)i was using stepper motor for continuos motion so it is my first time to us continuos servo  ,and i found it to be  quit easier that i imagined

    2) At first i used to think that continuos motion would result only to wave motion, but now i do understand more of we could alter these types of motions .

     
  • Unknown's avatar

    Adiel Fernandez 9:14 pm on March 7, 2013 Permalink | Reply  

    Embedded Arduino Automaton Free Writing (3/7) 

    What did you find surprisingly difficult in this embedded arduino automaton project?

    -For me it was creating rigid structures that could support the weight of what I wanted to have the automatons do. In addition to supporting the weight, the structure had to support lateral stresses from using gears that were not as precise as normal meshing gears are. The first model I made from paper had to be reinforced after breaking several times, the second model was made out of cardboard and a little better but still prone to jamming and material failure. The third model was built right away with a wooden internal structure to firmly and precisely hold the gears and moving components in place.


    What did you find surprisingly easy?

    -The code for the projects was fairly straight forward and did not take much time. This is why I spent more time and energy working on the mechanics of the models.


    Did you get inspired with any derivative works from doing this project?

    -I was inspired fairly early on with these automata and adapted the very first one to have my own caricature on top. Instead of a bouncing kangaroo, I made a flying eagle. The second and third models were entirely designed by me. The second model would have several changes if I were to do it again, to make the mechanism function without the consistent jamming. The third automata is a spider with 8 moving legs. Although the legs move fairly well without jamming, the movement is not realistic. My original idea was to have a different mechanism that would make the movement much more realistic, but it would have taken too long to build a structure to support all the working parts from scratch so I abandoned it for a simpler mechanism that was less anatomically accurate.

     
  • Unknown's avatar

    naterudolph 9:14 pm on March 7, 2013 Permalink | Reply  

    Embedded Arduino Paper Automata Project – Free write 

    It’s surprisingly difficult to achieve consistency with the paper. Individual pieces would come unglued under pressure or wear out and start falling apart. Each of the books had a various weights of paper that made it more or less difficult. The thicker paper was easier to use on the large portions, but practically impossible to fold accurately for the smaller pieces. With the lighter paper, the small pieces were easy to fold but the large pieces were considerably less stable.

    The magic of the project was the coming together of the last couple pieces. For each of the paper toys we made I was blindly trusting the instructions and shocked when things actually started moving. Being able to examine the working gears and levers after the fact was fascinating knowing how each of the individual pieces not only interacted with each other, but the means of their construction from 2 dimensional paper.

    I was definitely inspired to start working on more mechanical movements, but extremely frustrated with the fragility of paper. Having made these models is helpful to know some of the routine methods for creating certain behaviors. I almost feel knowing these things now, though, just making detailed sketches and carefully planning everything out would be just as advantageous, and use laser cut or molded plastic pieces so I can trust they will be durable enough to testing by a wider audience.

     
  • Unknown's avatar

    JeannetteSubero 8:47 pm on March 7, 2013 Permalink | Reply  

    Peak-a-bear 

    Controlling a servo with an ultrasonic range sensor. Second paper toy.

     
c
Compose new post
j
Next post/Next comment
k
Previous post/Previous comment
r
Reply
e
Edit
o
Show/Hide comments
t
Go to top
l
Go to login
h
Show/Hide help
shift + esc
Cancel